Source Catchment users - Transitioning to Source
There have been a number of changes to the Catchments parts in Source that will require some conversion and checking. The Alternative option is to re-build your project from scratch.
It is useful to have the same project open and run in the SC public release so that outputs can be compared to check that specific conversion of components has worked correctly.
Before you begin
Load your SC public release version into Source and save a backup!
Look and feel
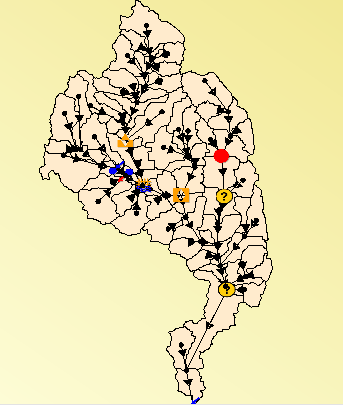
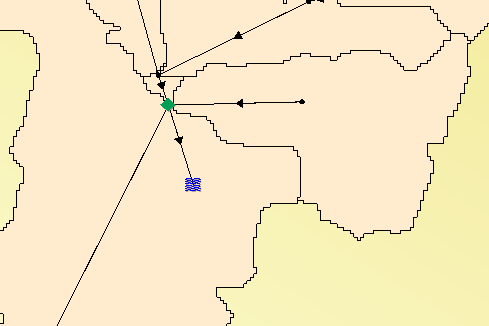
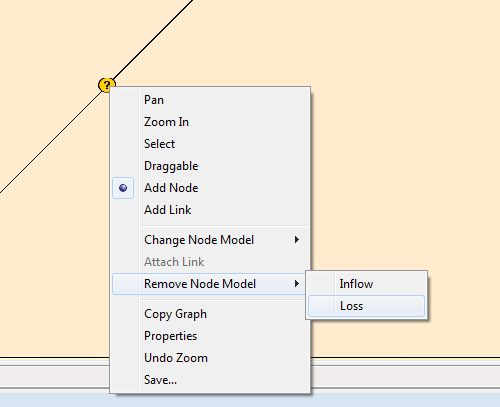
On loading your SC public release version into Source, you may notice that node icons are now visible in the Geographic view. Nodes with multiple models or unknown node models (such as old demand models) will appear as a yellow circle with a question mark.
- Save the project under a new name – this will upgrade the database in the project to be equivalent to the Source version you are transitioning to
- Make note of the types of node and link models, location of storage links and if there are any nodes with multiple models assigned, and what data is used to configure these models
- Extract any necessary data, particularly from any storage links
Ordering
The ordering Algorithm will automatically change from "Upwards pass relying on rules" to "New rules based ordering". This is a crucial step to avoid backward compatibility issues as the old ordering system, which was turned on by default in the SC public release, has been removed from Source.
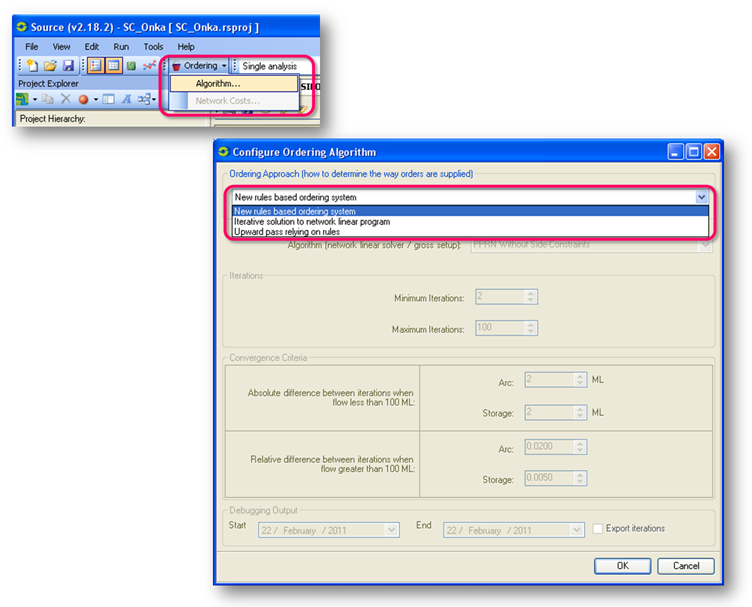
Save the project, configure and run the scenario(s) – at this point any obvious bugs associated with the new rules based ordering should be exposed.
Adding Demands using Supply Point + Water User nodes
Demands are now represented at a "Water User" node. To change from previous Demand models:
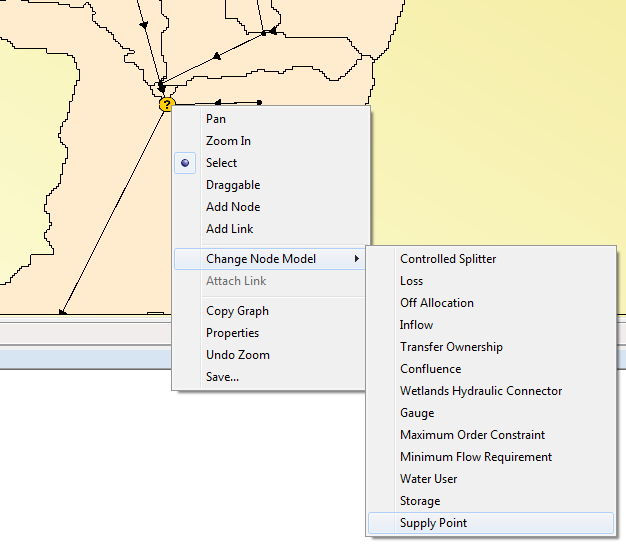
- right hand click the existing demand model and change it to a Supply Point
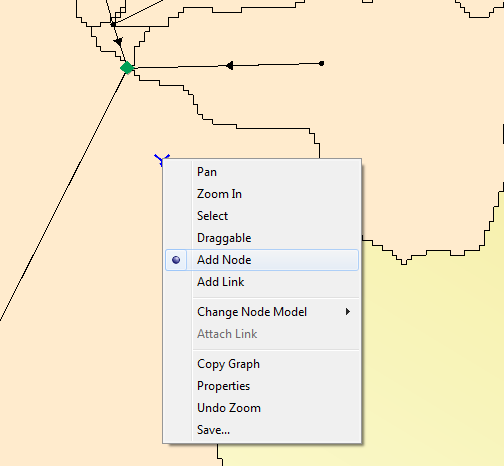
- Add a new node to be the water user:
- Change it to a Water User node model (similar to step 1)
- Add a link from the Supply point to the new Water User node.
- Double click on the Water User node and configure the demand.
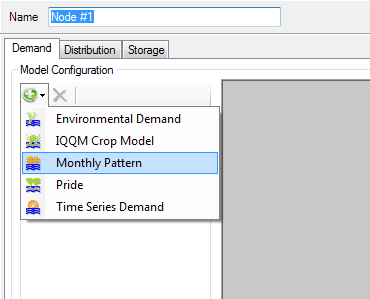
If you would like to use the Expression Editor to define the demand, select "Time Series Demand" and define it with an expression.
All confluence node models have to be set up with "Regulated" between the supply point and the Storage. As you will see from below - all nodes must now have a node model. Confluence node models are included automatically.
One node model
Nodes now MUST be set up with ONE node model. For new scenario's this is done automatically. This will concern all users, in particular Catchment users who previously had multiple node models on a single node.
Under Advanced/Development (Alt + F12) there is an option which will add in cofluence node models to existing nodes that don't have a model associated. It will also try to detect which branch, if any, should be set up as regulated branches. This is required for upgrading projects.
Adding in extra nodes for Multiple node models
Projects can use version 3.0.5 onwards to upgrade. From the geographic view you can use the right hand context menu to
1. Remove all node models except one:
2. Insert a new node,
3. Remove the current link - (Select and hit delete). This also removes a catchments reference to that link.
4. Add in new links
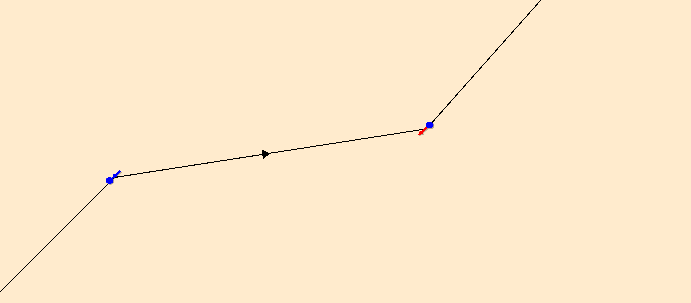
5. Associate the catchment with a link to flow into. This needs to be done manually since (as you can see from the screen shot) once you add in new nodes and links to connect them the catchment flow could go to either, so it must be set manually.
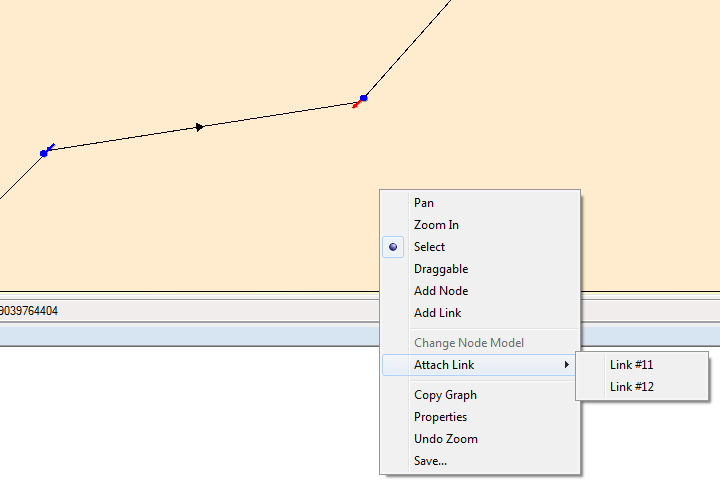
NOTE: If you are going to use routing the link length will need to be set.
Since node models can now be changed from the geographic view, there is no need for the node model assignment page of the wizard, and the form <Edit><Nodes> so they have been removed.
Routing
Source now only supports "No Routing", "Lagged Flow Routing" and "Storage Routing".
There is a tool to automatically convert any muskingum or laurenson routing models to the storage routing model, including the parameters:
- Select from the Advanced/Development menu (Alt + F12 to unhide the menu) > Update to storage routing method. You will be prompted to continue the process. The conversion may take a few minutes.
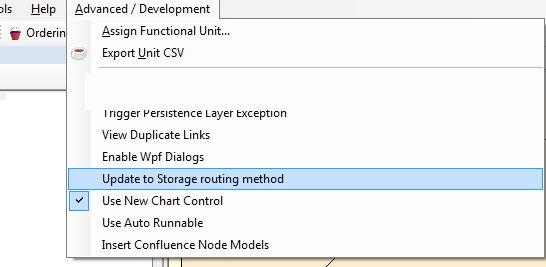
Once the automatic conversion has been completed, the storage routing model will be visible under Links in the Project Hierarchy and can be accessed from the Links assignment window or by double clicking on a link.
The Source SRG has information on how the storage routing model can be configured for muskingum and laurenson routing and other methods.
Storages are now on the Node rather than the link
Storages were moved from the link to the node. Moving Storages to the node enables multiple outlets to flow to different downstream locations. Storages need to be moved to Nodes for the new ordering system to work.
Converting storage links to storage nodes:
Note once a storage link is removed the option to add a storage link becomes disabled
1. Decide where the best position for the storage node should be in relation to the current storage link.
a. If the storage link is a link with a leaf node (ie, a node that has no inputs from the subcatchment), then the storage node will need to be the downstream node of the storage link, so that inputs from the subcatchment is the upstream input to the storage.
b. If the storage link is below several sub catchments then the location of the storage node will be dependent on what portion of the catchment area will act as inflow to the storage. With a storage link the inflow off the sub catchments enters the link above the downstream node and thus contributes to the inflow of the storage. Therefore, the downstream node of the storage link will generally be the correct location of the storage node.
2. In the link model assignment remove the storage link
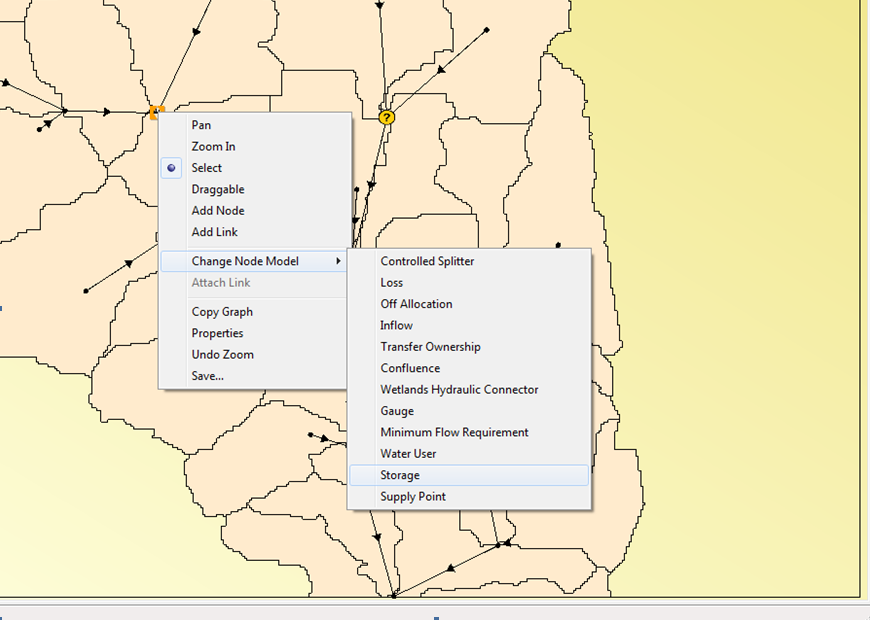
3. In the geographic view right hand click on the node and select "Change Node Model" then "Storage:"
4. Double click the node model to re-configure the storage node with the data from the storage link. There are a few new properties that require set up due to the new rules based ordering system.
a. In the Outlets tab the outlet path link needs to be specified for each outlet type – this is a requirement as multiple outlets are now supported.
5. Save project.
All confluence node models have to be set up with "Regulated" between the supply point and the Storage. As you saw above - all nodes must now have a node model. Confluence node models are included automatically.
Constituents
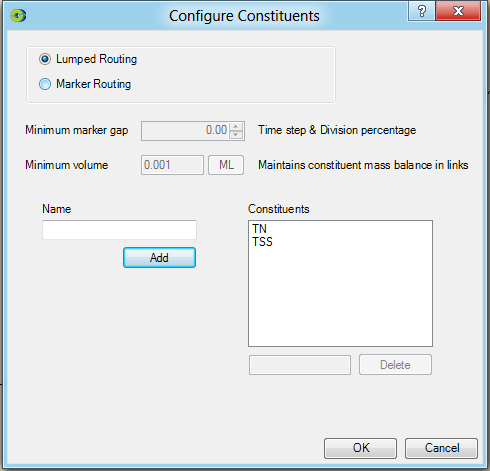
Constituent modelling has been changed dramatically. Source now allows for modeling of both Lumped Constituent Routing and Marker Routing.
Constituents can now be changed after a scenario has been created however a save and re-load is required.
Please see the User Guide for updated information about the Constituents.
Known issues
- Recording selections will be lost.