Nodes
About Nodes
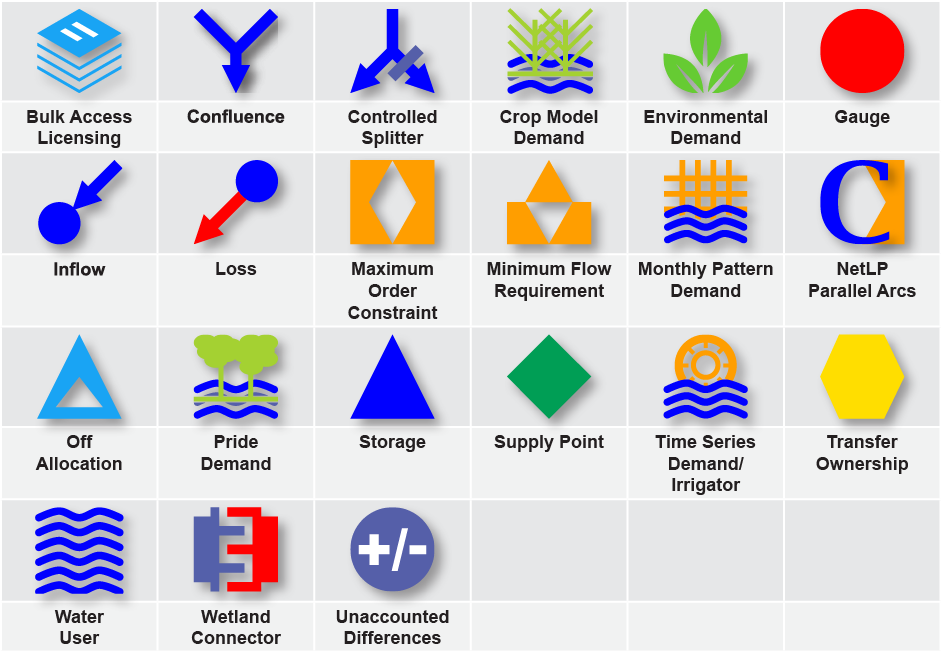
Nodes represent places where actions or measurements occur in a river system, where water can be added, extracted, stored, recorded, or change ownership in a model. A node can be used to represent things that actually happen over a large physical area but that, for modelling purposes, occur at a single point. In sub-catchments, they provide a position in the catchment network where water management information can be placed. In Source, nodes are depicted using the icons shown in Figure 1.
Figure 1. Node icons for Source
Using nodes in Source
This section outlines how to work with nodes in Source. Some actions can be duplicated for links.
Adding nodes in a model
To add a node to a model, either drag the appropriate type of node from the Node Palette and drop it onto the Schematic Editor, or right-click on the Schematic Editor and choose the appropriate node from the Add menu.
Node and link default names
Whenever a node or link is created, it is given a default name in the pattern:
type #
where "type" is the type of node or link and "#" is a number which increases monotonically during the life of the schematic.
Node connections
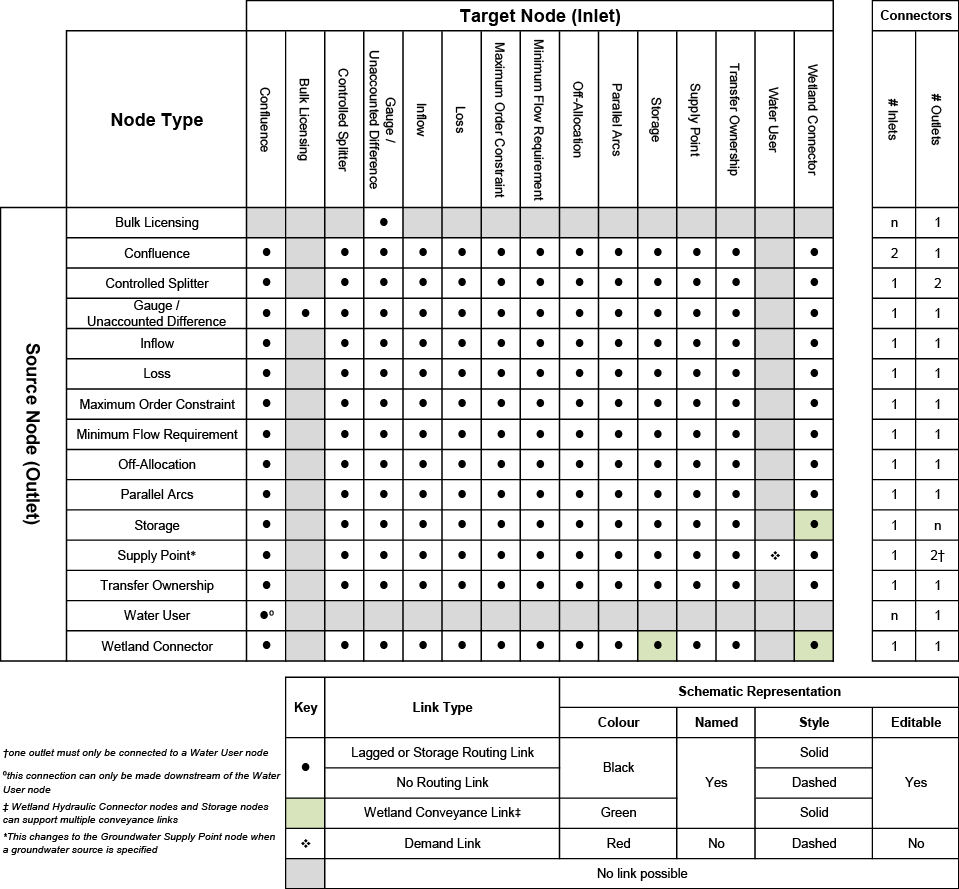
Nodes can be joined to each other according to the matrix in Figure 2. Links between nodes will vary depending on the nodes being connected. For example, a wetland conveyance link will occur when a storage node is linked to a wetland connector.
Figure 2. Node connection matrix
Renaming nodes and links
Changing the name of a node or link only alters it in the scenario that you changed it in. A change in one scenario does not propagate to others; they are not linked in any way. You can change the name of a node or link using one of the following methods:
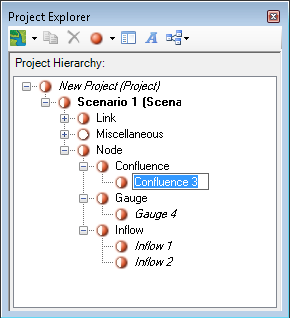
- To make the Project Explorer visible, choose View » Project Explorer or click its equivalent on the toolbar. In the Project Hierarchy, click the node or link to select it, pause, and click a second time. The name will be prepared for editing (Figure 3). Type the new name and press return; or
- Right-click the node or link in the schematic and choose Rename. The name will be prepared for editing. Type the new name in the field, then press Enter.
Figure 3. Renaming a node or link
Editing nodes
Use the feature editor of a node to change the parameters associated with them. To open a feature editor you can either double click on the node icon, or right click on the icon and select Edit.
Searching for nodes and links
The Find panel in Source allows you to search for specific nodes and links within open scenarios. Press Ctrl+F to open the Links panel (Figure 4) and enter the search term. The result set indicates the scenario containing the node/link along with its type. This is useful when you are working with very large scenarios.
Figure 4. Find panel

Copying and pasting
You can copy and paste a desired selection of nodes and/or links within the same scenario only. Select the desired nodes and/or links, right click and choose Copy. To paste the selection, right click on the Schematic Editor and choose Paste.
Deleting nodes and links
Deleting nodes can be achieved simply by selecting the node and pressing the delete key, or by right-clicking it and choosing Delete from the contextual menu. Deleting a link removes only the link. Deleting a node removes both the node and any links that were attached to the node.
This section describes how the various nodes available in Source can be configured. For the scientific background behind their operation, refer to the Source Scientific Reference Guide.
Adding notes to nodes and links
You can add a text-based message or note to a node or link. Refer to About notes for more information on notes.
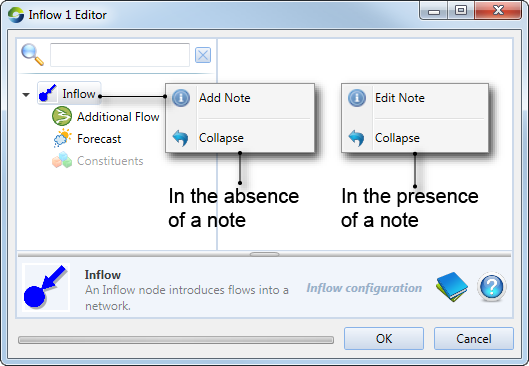
To add (or edit) a note:
- Open the feature editor;
- Right click on the icon (of the node or link); and
- Choose Add Note (or Edit Note) from the contextual menu.
Figure 5 shows how to follow this procedure for an inflow node.
Figure 5. Inflow node, adding/editing a note