Note: This is documentation for version 4.11 of Source. For a different version of Source, select the relevant space by using the Spaces menu in the toolbar above
Catchment scenarios
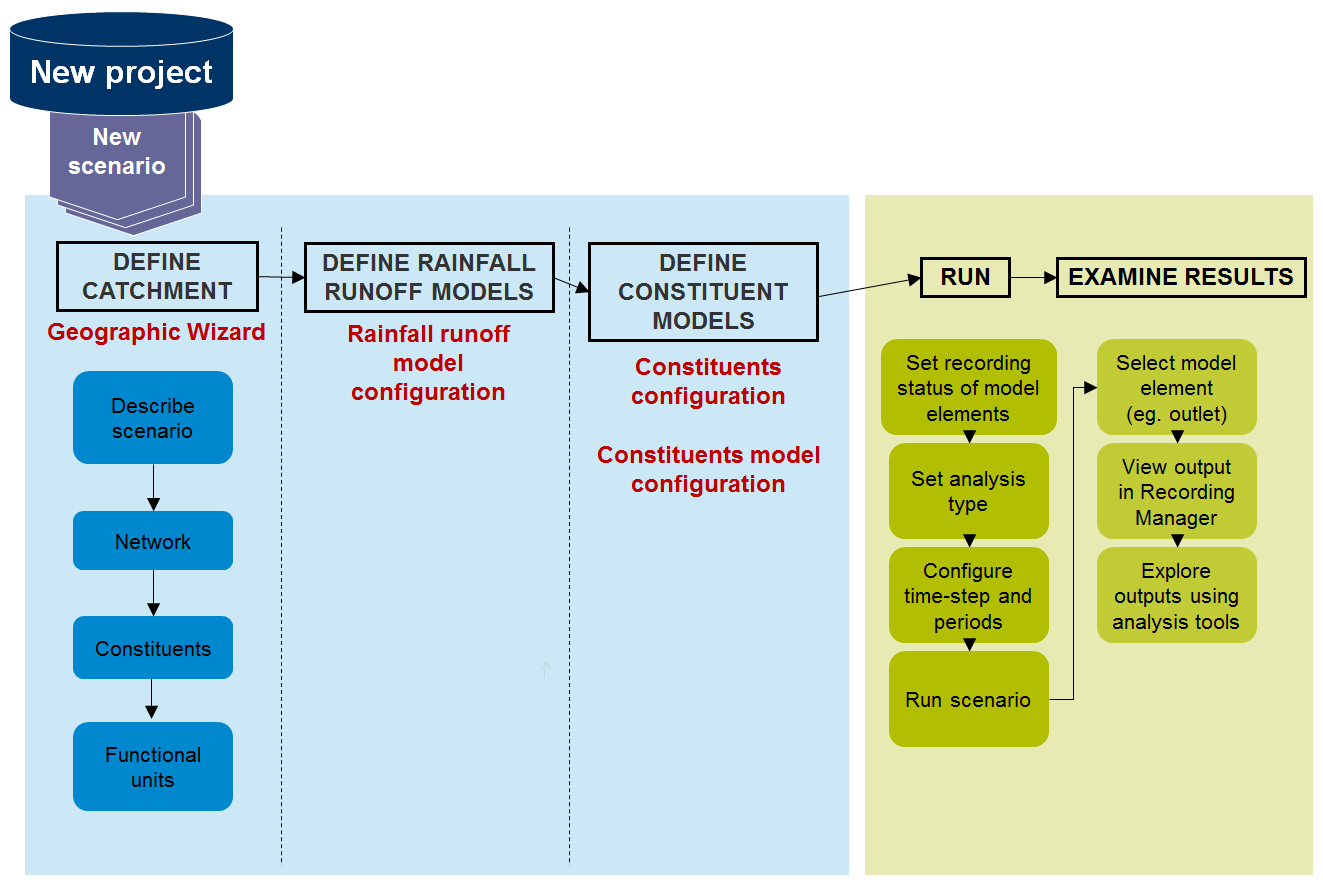
Catchment or geographic scenarios in Source are generated and managed using three distinct components, in the following order:
- The Geographic Wizard for catchments is used to define the catchment area;
- Functional units assignment;
- Assigning and paramterising Rainfall runoff models; and
- Configure and parameterise constituents (refer to Configuring constituents in catchment models).
Figure 1 outlines the steps required to generate and run a catchments scenario.
Figure 1. Creating and running a catchments scenario
Subcatchment filter
Assigning functional units, rainfall runoff models and constituents to subcatchments is done using a table in the corresponding dialog. To aid assignment, there is a subcatchment filter in each table. To access the filter:
- Hover your mouse pointer on the right of the Subcatchment column header until a drop-down arrow appears; and
- Click on the arrow to open the filter dialog (Figure 2).
You can choose which subcatchment to filter on using one of two filter types (as shown in Figure 2).
Figure 2. Subcatchment filter
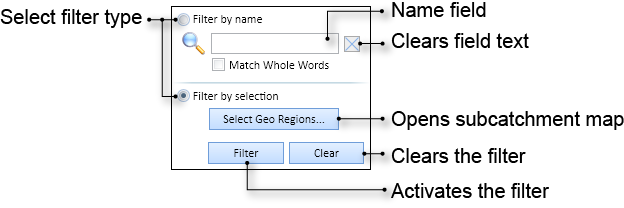
Subcatchment name filter
Select Filter by name, then enter all or part of the subcatchment name and click Filter. Toggle on Match whole words to search for whole words only. For example, if you search for "#2" when Match whole words is toggled off, subcatchments named SC #2, SC #20, SC #201, etc. will be found. If you toggle on Match whole words, only SC #2 will be found.
Subcatchment map filter
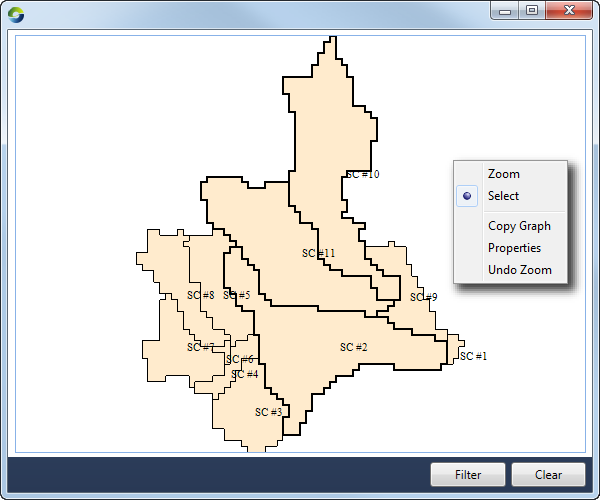
Select Filter by selection, then click Geo regions... to open the subcatchment map in a separate dialog (example shown in Figure 3). In the map, click on the subcatchment to select it (highlighted with a black boundary). For multiple subcatchment selection, you can click and drag to draw a rectangle over the region with your mouse, you can also press Ctrl to keep the current selection while you select another, disparate region either by clicking or by clicking and dragging. Once you have selected subcatchments, click Filter to close the subcatchment map and apply the filter or click Clear to clear all subcatchment selections.
Right clicking on the map opens the contextual menu, where you can:
- Zoom – when enabled, click and drag on a region to zoom in. Note that selecting zoom disables subcatchment selection, and also deselects any previously selected subcatchments;
- Select – re-enable subcatchment selection after zooming;
- Copy Graph – copies an image of the subcatchment map to the clipboard;
- Properties – opens the Property Editor dialog for configuring the display properties of the subcatchment map; and
- Undo Zoom – reset the zoom level to 100% and display the full map again.
Figure 3. Subcatchment map, example
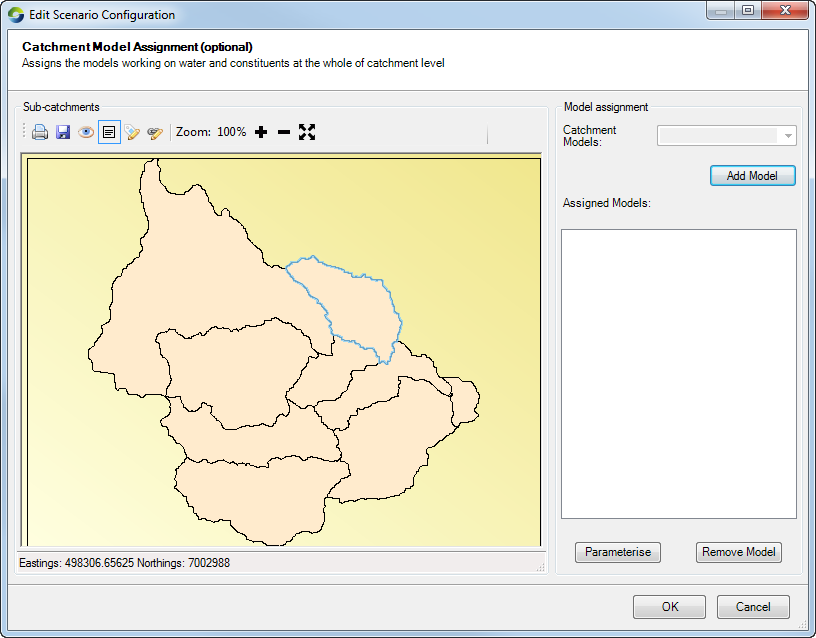
Assigning catchment models
You can assign catchment models to a catchments scenario ONLY if a catchment model plugin has been installed. It allows you to assign models to entire catchment or individual sub-catchments and it generally applies to catchments that model, for example, groundwater (for the GWLag Plugin). Choose Edit » Catchments » Assign Models to open the dialog.
Figure 2. Assign catchment models
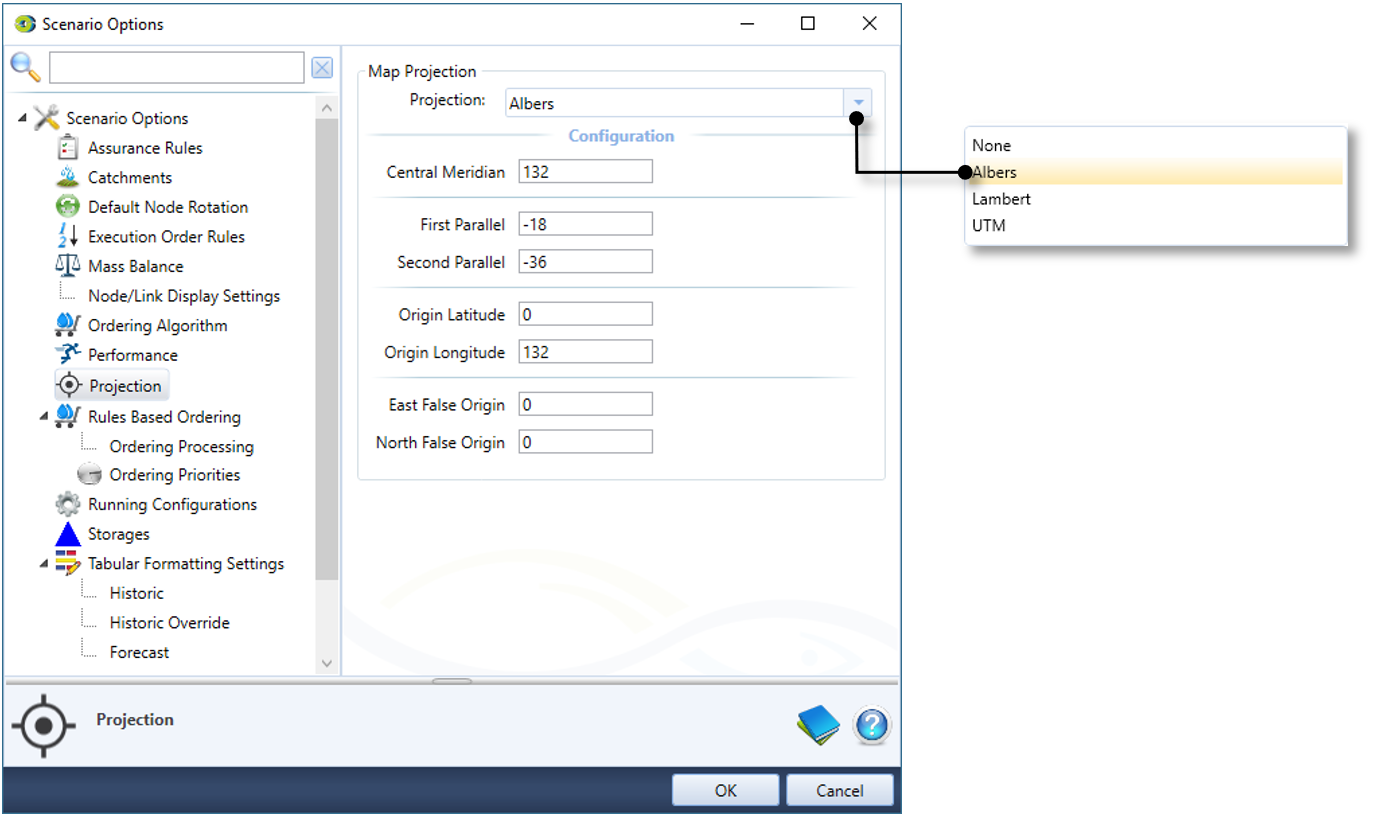
Projections
Source uses projections to convert projected layers from the geographic view to latitude and longitudinal coordinates for the map view. Choose Scenario Options » Projection to edit projection information for a catchments scenario (Figure 3).
Figure 3. Scenario Options, Projection